
Welcome to the Christmas Tales: Fellina's Journey Walkthrough
Find Santa's magic star and stop the gruesome Icy Elf from ruining Christmas for everyone on the planet in Christmas Tales: Fellina's Journey!
Whether you use this document as a reference when things get difficult or as a road map to get you from beginning to end, we’re pretty sure you’ll find what you’re looking for here.
This document contains a complete Christmas Tales: Fellina's Journey game walkthrough featuring annotated screenshots from actual gameplay!
We hope you find this information useful as you play your way through the game. Use the walkthrough menu below to quickly jump to whatever stage of the game you need help with.
Remember to visit the Big Fish Games Forums if you find you need more help. Have fun!


This walkthrough was created by Brabl Ltd, and is protected under US Copyright laws. Any unauthorized use, including re-publication in whole or in part, without permission, is strictly prohibited.
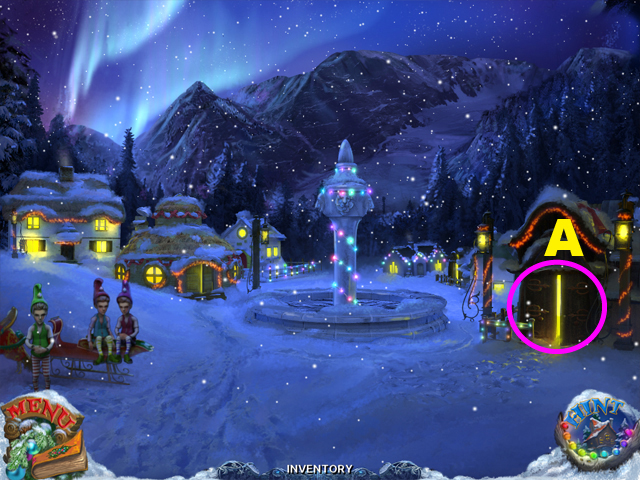
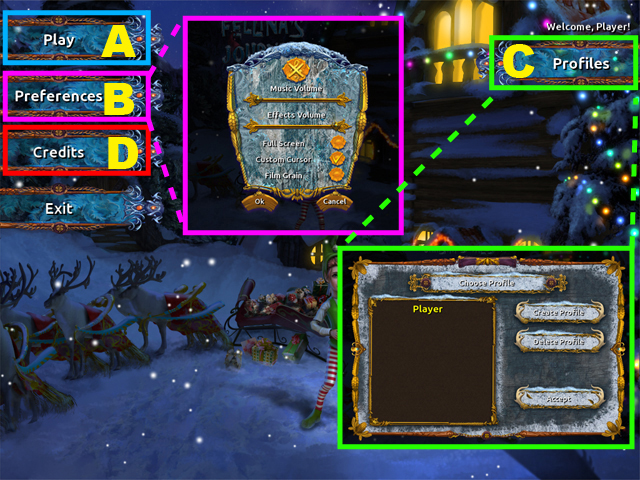 Click on Play (A) to begin or continue your Christmas adventure.
The Preferences (B) button allows you to adjust the music volume, effects volume, turn off the custom cursor, and film grain.
The Preferences menu is accessible from both the main screen and the in-game menu.
The Profiles (C) can be used to manage your profiles in the game.
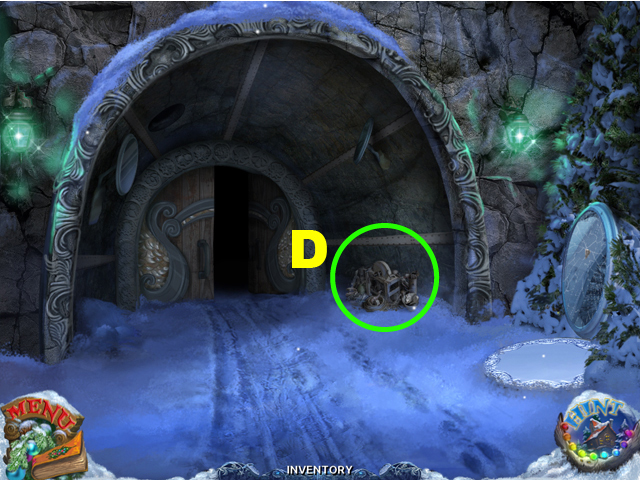
Click on Credits (D) to see them.
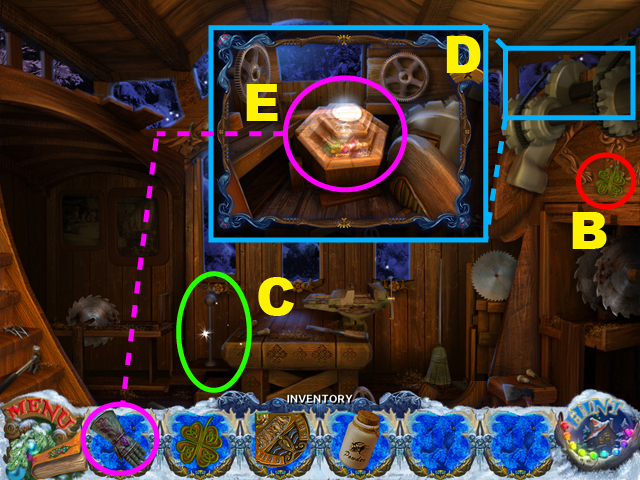
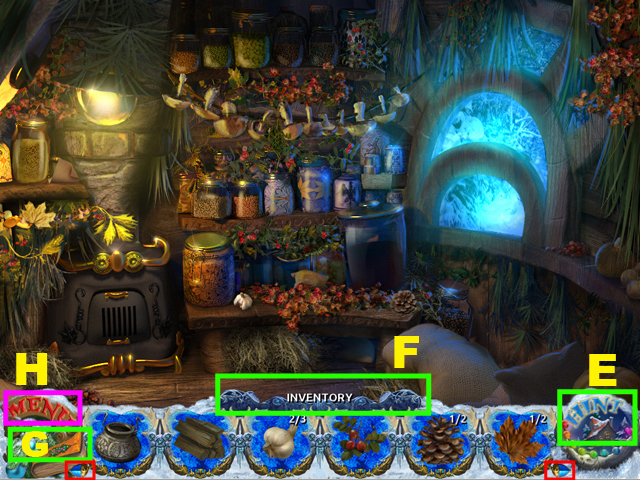 The Hint is unlimited, but you must wait for it to re-fill (E).
Roll over the cursor to look inside your inventory (F).
Use the arrows (marked in RED) on the sides of the inventory tray to scroll through all possible options.
Read the diary to view your tasks, progress and story elements (G).
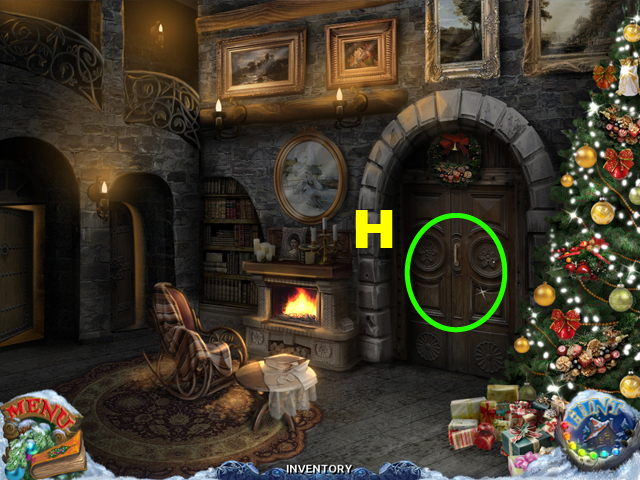
Click the menu button to access the settings menu (H).
You may skip mini-games once the skip button is full.
There is a brief tutorial at the start of the game if you choose the casual type.
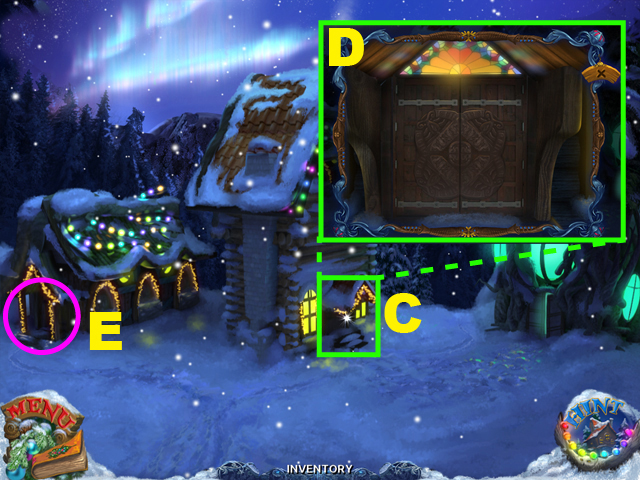
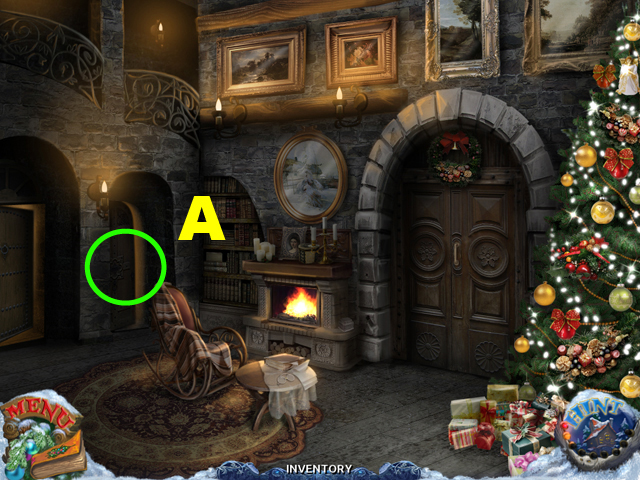
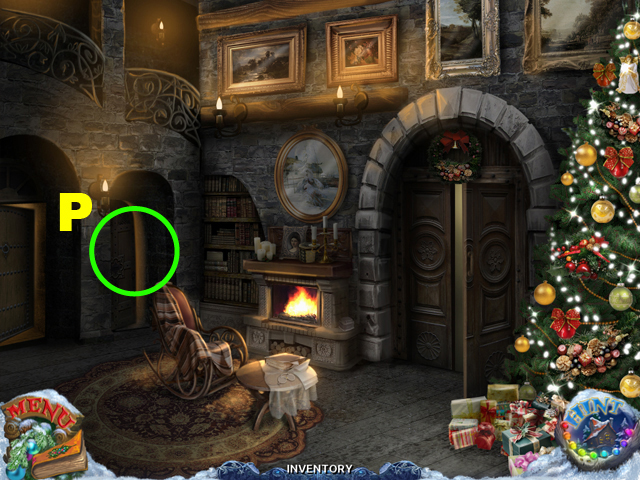
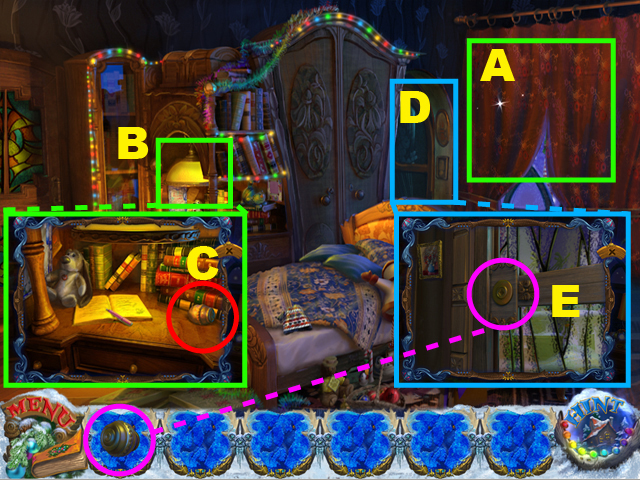 Open the blinds (A).
Zoom the table (B); take the DOOR HANDLE (C).
Examine the door (D) and use the DOOR HANDLE on the door (E) and go through the door to the Balcony.
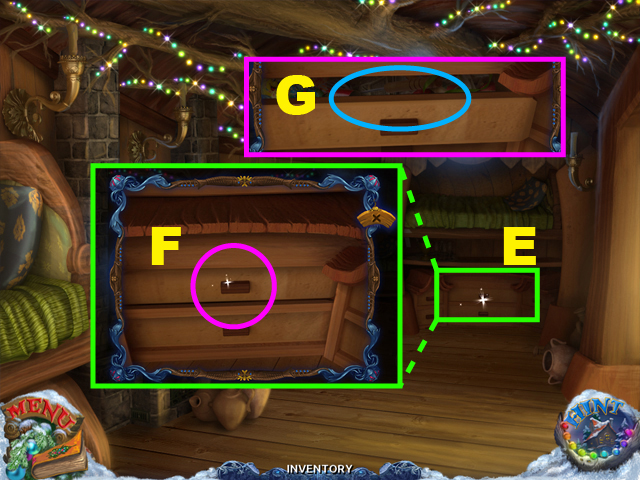
 Talk to the Elves (F).
Take the Scarf (G).
Open the Chest and look inside, this will be the Hidden Object scene (H).
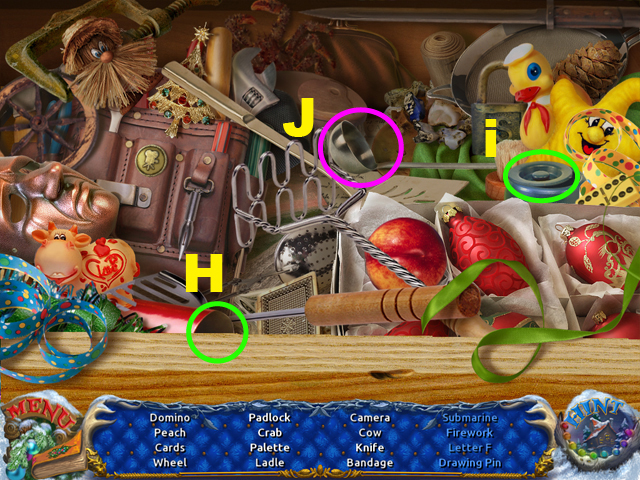
 You will need to look inside the Box (E) and Lamp (F).
Locate all the items in the list.
The MITTENS will go into your inventory (G).
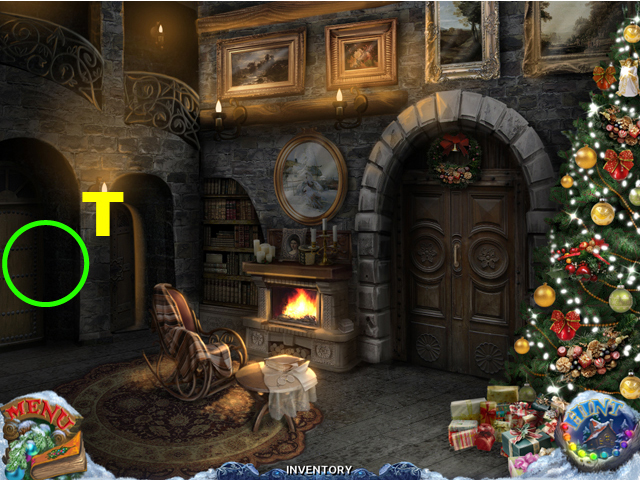
Go back to the Bedroom.
 Take the HAT (H).
Open the Box (I) and take the BOOTS (J).
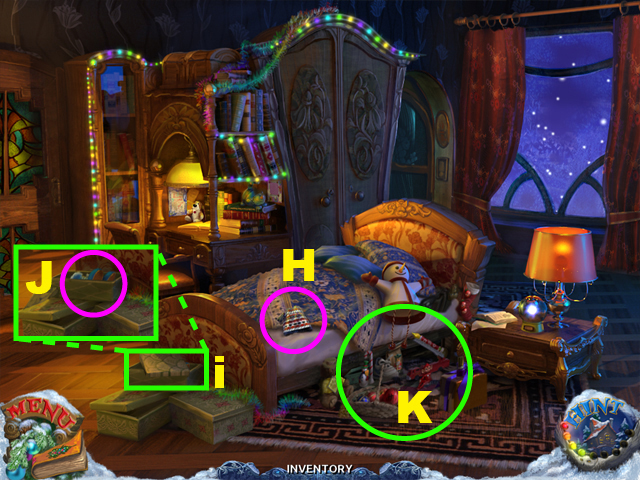
Examine under the bed, this will be the Hidden Object scene (K).
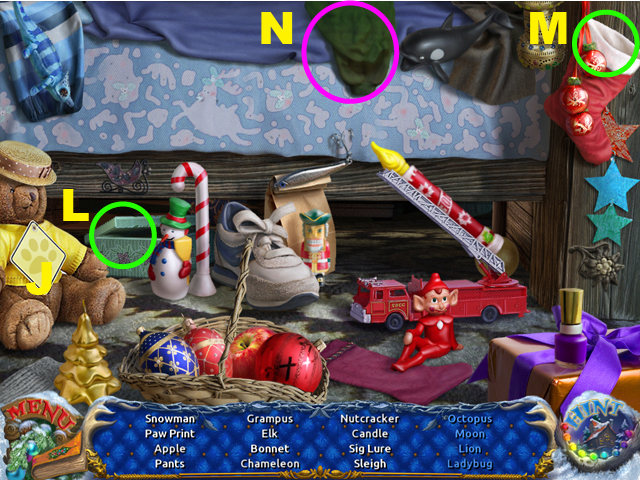 You will need to look inside the Box (L) and Lamp (M).
Locate all the items in the list.
The PANTS will go into your inventory (N).
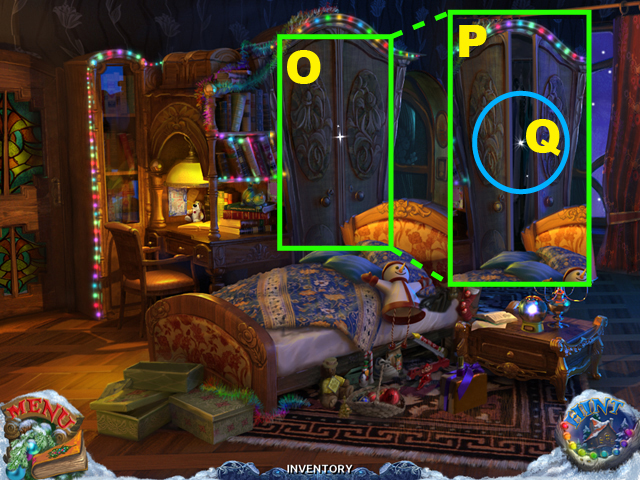 Open the Wardrobe (O).
Examine it (P) and this will be the hidden object scene (Q).
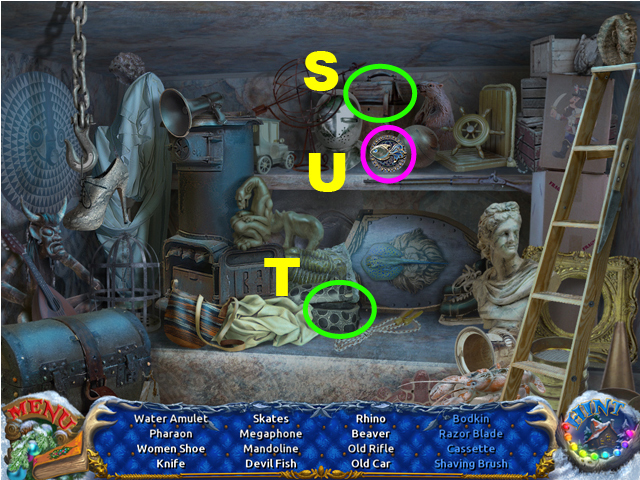
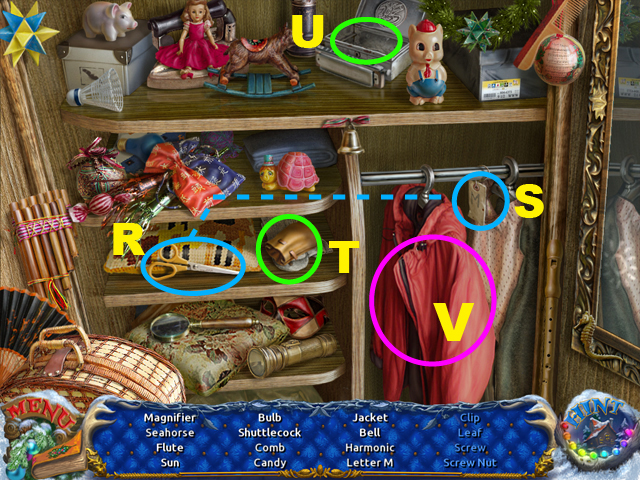 Take the SCISSORS (R) and use it on the tag to take the LETTER M (S).
You will need to look inside the Box (T) and Lamp (U).
Locate all the items in the list.
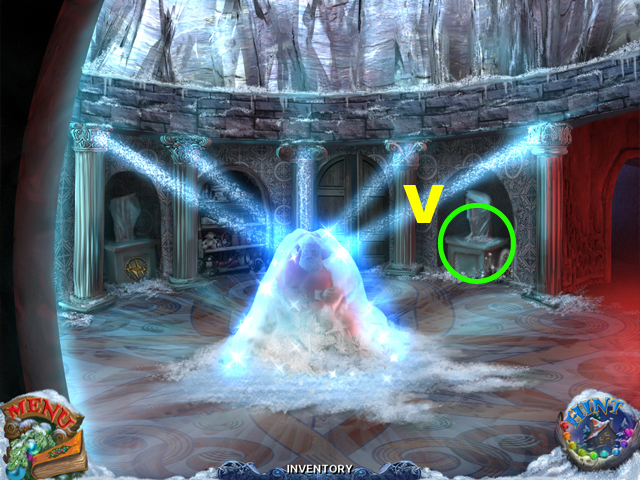
The JACKET will go into your inventory (V).
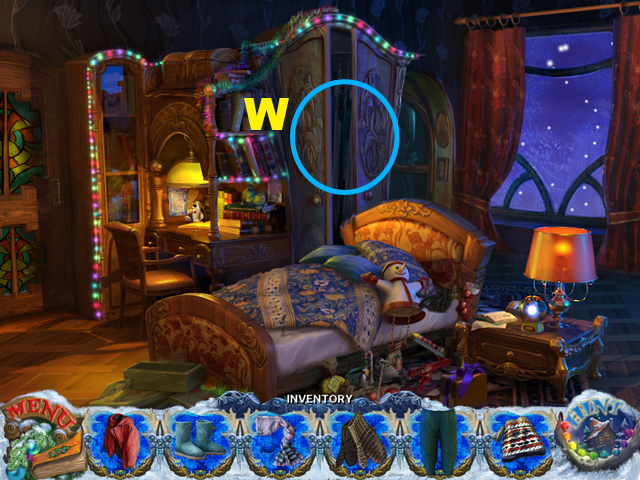 Examine the Wardrobe again (W).
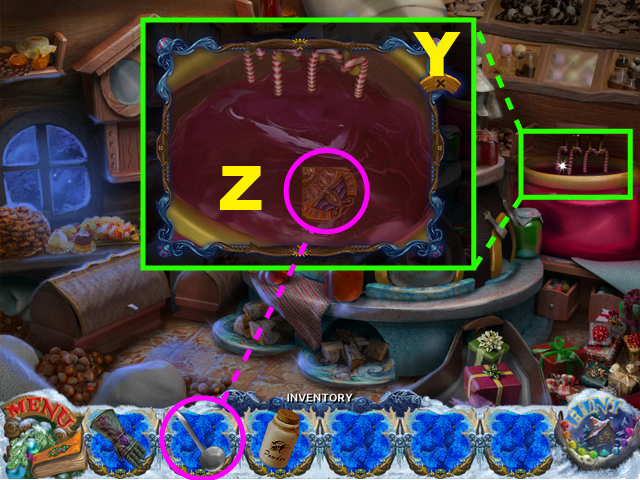
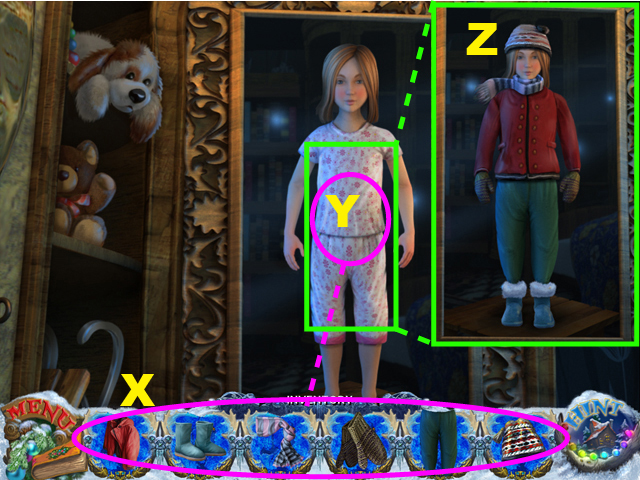 Put all the CLOTHES (X) on the girl's reflection (Y).
When you clothed completely (Z) go back to Balcony.
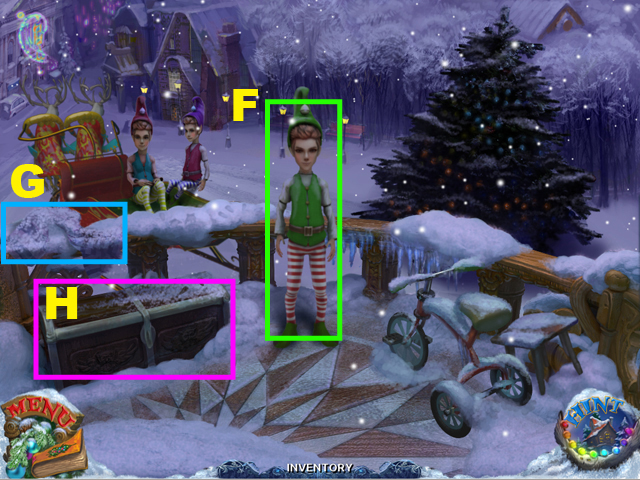
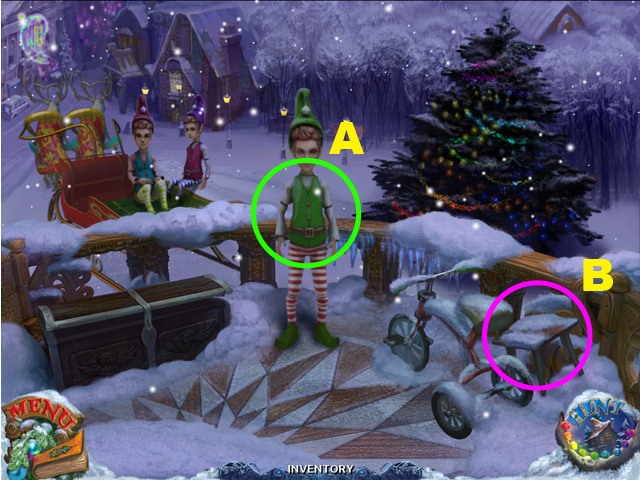 Talk to Elves (A) again.
Take the STOOL (B).
Go back to the Bedroom.
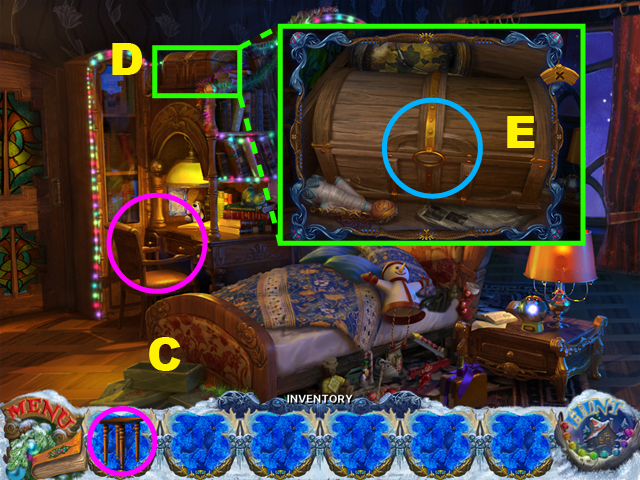 Place the STOOL on the CHAIR (C).
Now you can get the CHEST (D).
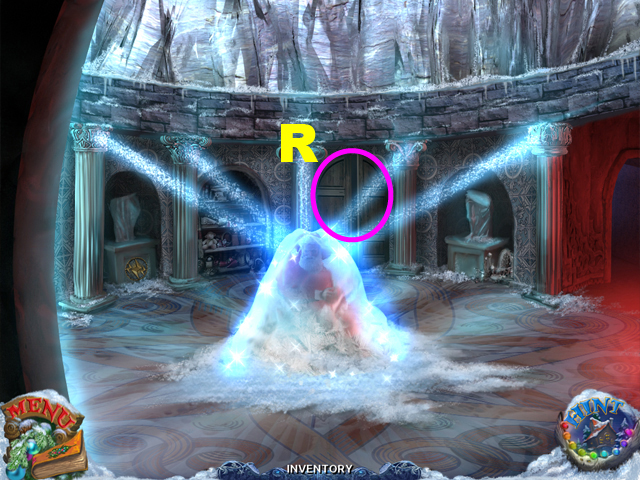
Open and examine the CHEST (E).
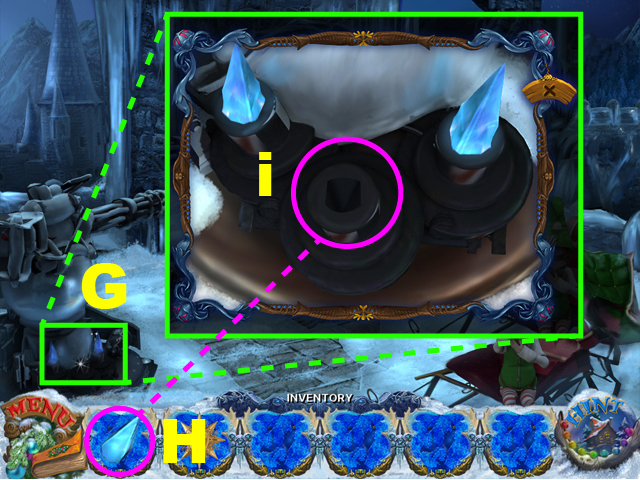
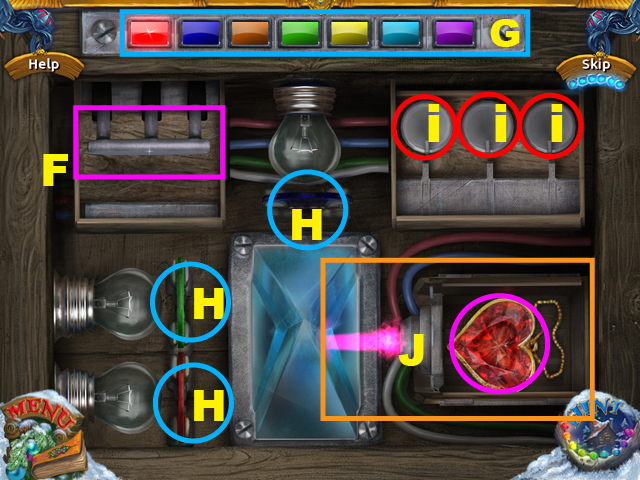 Turn on the machine (F).
Match colors one by one (G) by mixing thee RAYS (H) with the SWITCHERS (I).
When the last color will be mixed take the HEART'S AMULET (J).
Go back to Balcony.
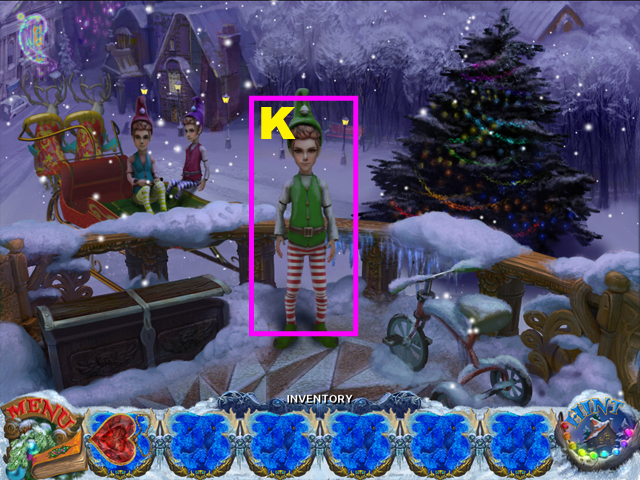 Talk to Elves (K) again.
Fly with them to the Lapland.
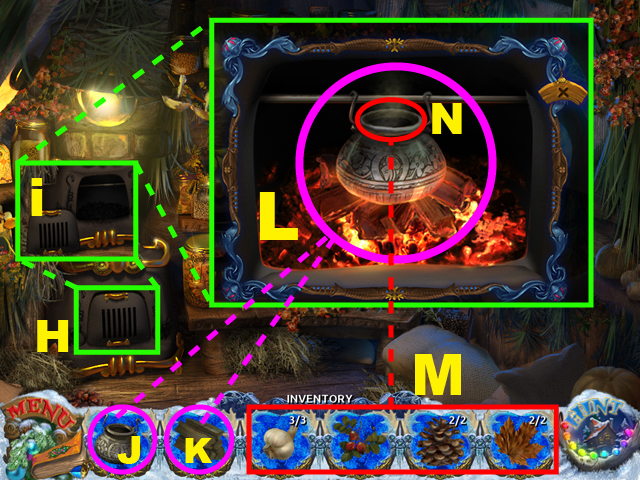
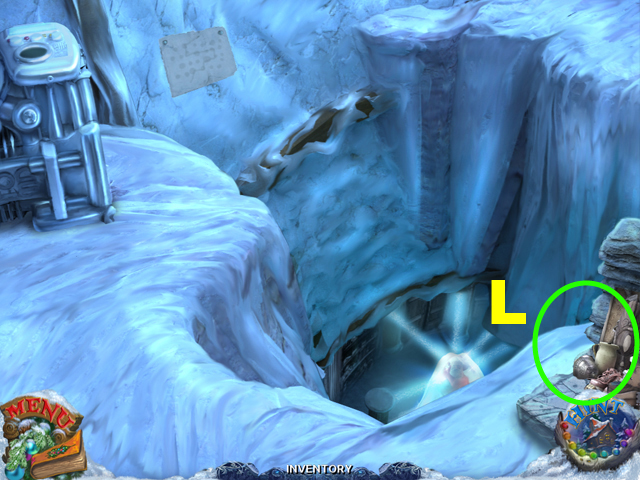
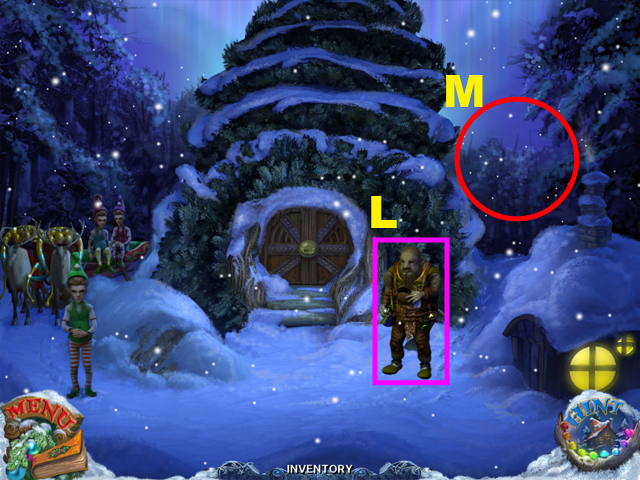 Talk to Kobold (L).
Go into the depths of the forest to find LEMMINGS (M).
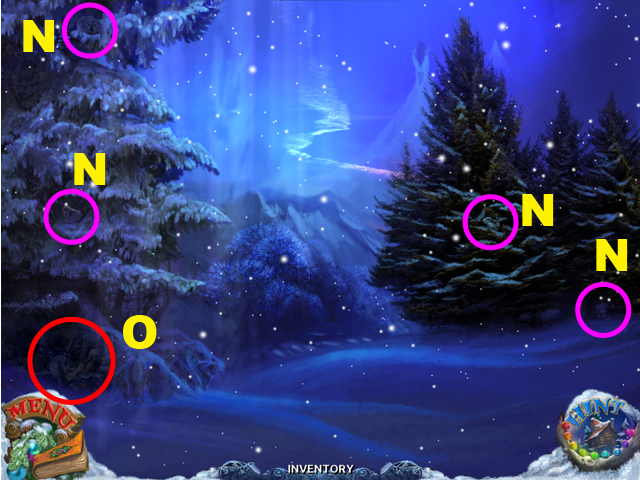 Take LEMMINGS (N).
Examine the roots (O) and this will be the Hidden Object scene.
 You will need to look inside the old Kettle (P) and in branches (Q).
Locate all the items in the list.
LEMMINGS will go into your inventory (R).
Go back to the Kobold.
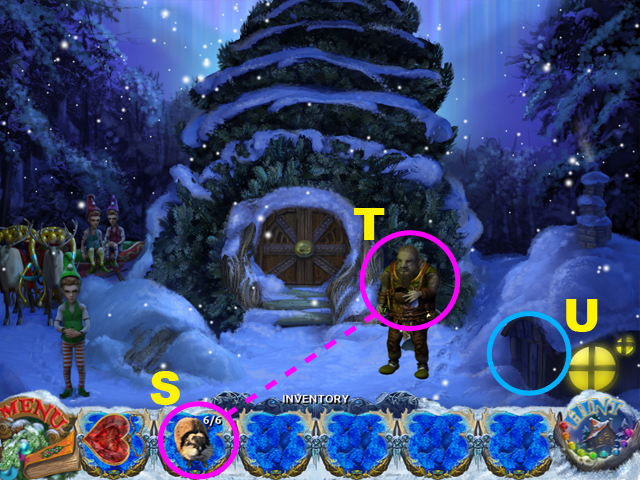 Give LEMMINGS to Kobold (S).
Talk to Kobold (T).
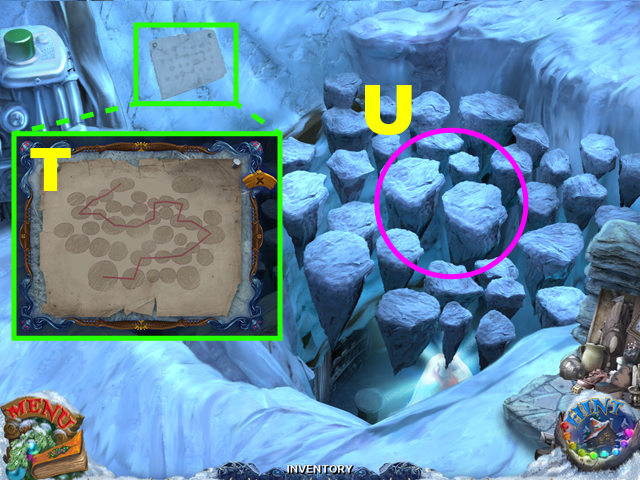
Examine the shed (U).
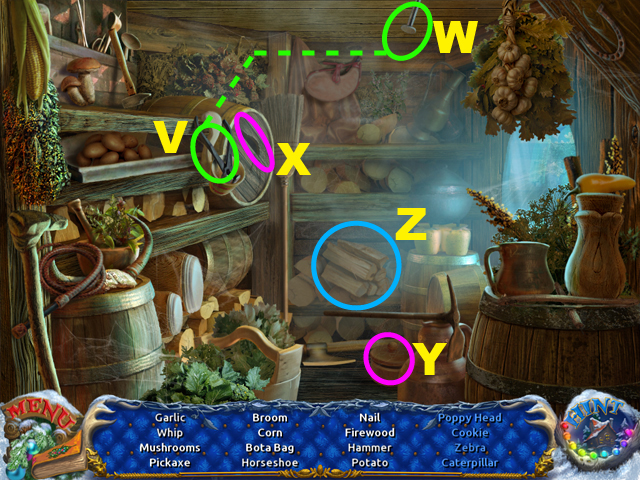 Take the tongs (V) and use it on the tag to take the NAIL (W).
You will need to look inside the Wooden Barrel (X) and Casket (Y).
Locate all the items in the list.
The Firewood will go into your inventory (Z).
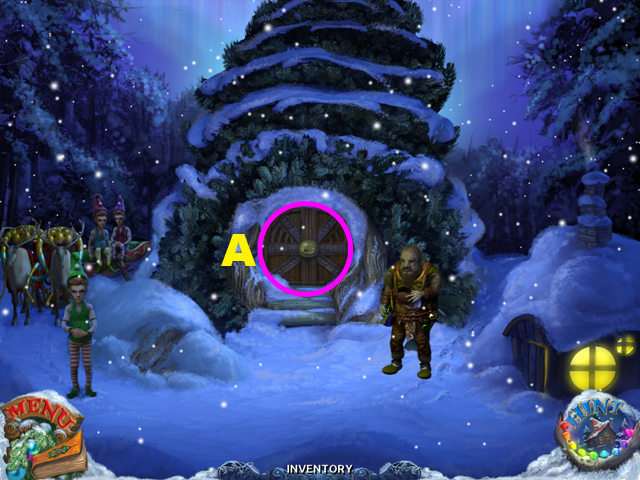 Open the door and go inside the Kobold house (A).
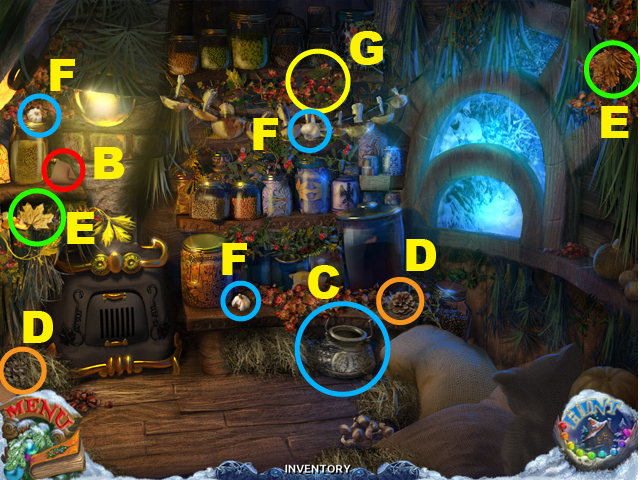 Read the RECIPE (B).
Take the POT (C).
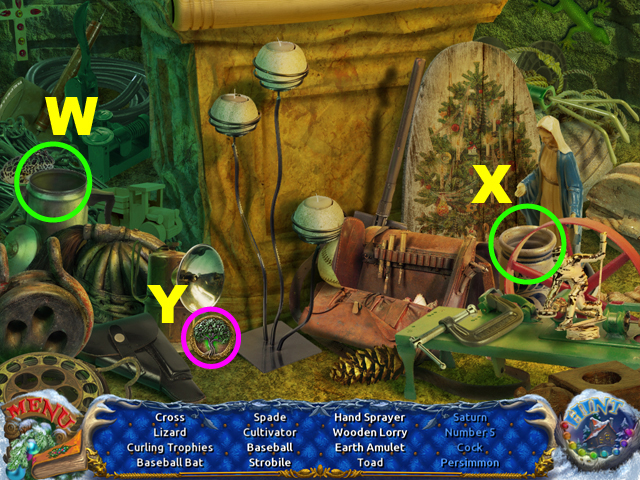
Find two STROBILES (D).
Find two MAPLE LEAFS (E).
Find three HEADS OF GARLIC (F).
Find the DOG ROSE (G).
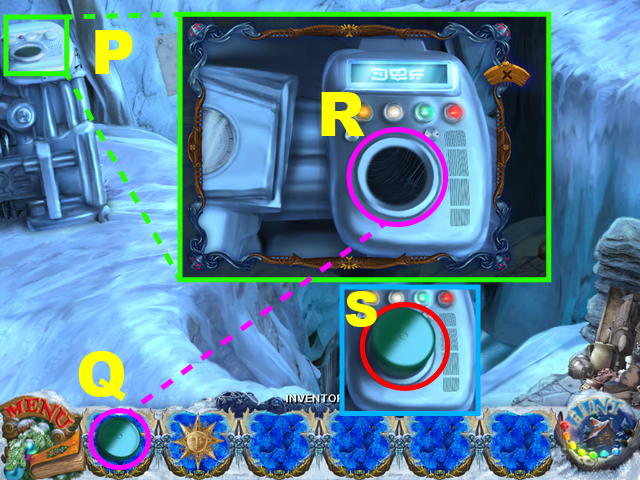
 Open the STOVE (H) and examine it (I).
Put the POT (J) into the STOVE (L).
Put the FIREWOOD (K) into the STOVE (L).
Put all INGREDIENTS (M) into the POT (N).
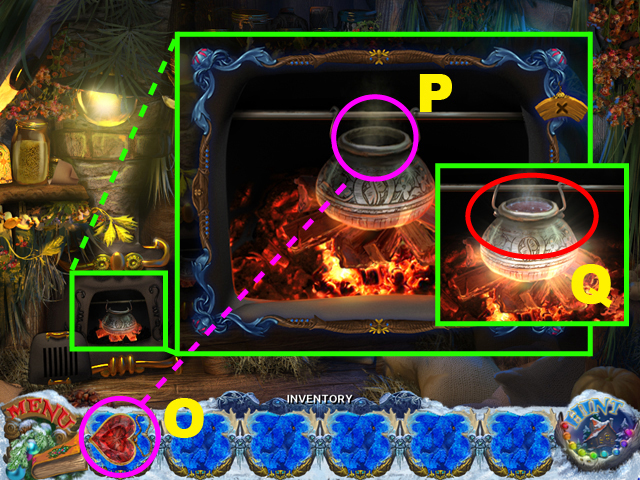 Put HEART'S AMULET (O) into the POT (P).
Drink the MAGIC POTION (Q).
Go back and talk to Elves.
 Talk with Elves (R) and fly to the Lapland!
 Talk o the Elves (A).
Go to the Second Boulevard (B).
 Examine the Santa's door (C).
Go to the Elve's House (D).
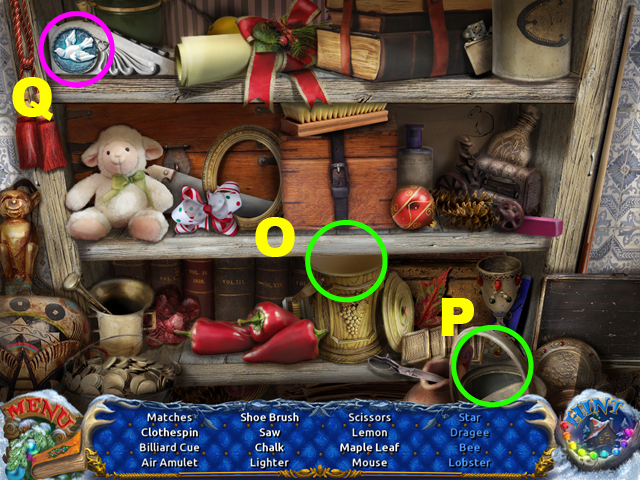
 Examine the shelves (E).
Open the shelve (F) and look inside it (G).
 You will need to look inside the Red tube (H) and in the Pot (I).
Locate all the items in the list.
The LADLE will go into your inventory (J).
Go back to the Second Boulevard.

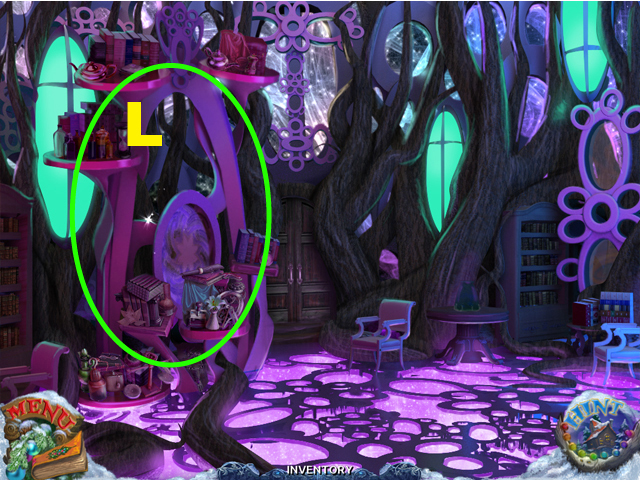 Examine the Magic shelves (L).
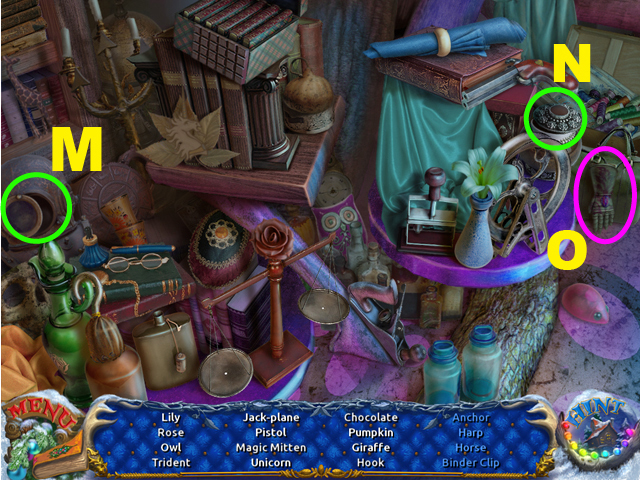 You will need to look inside the Old diving suit (M) and in the Casket (N).
Locate all the items in the list.
The MAGIC GLOVE will go into your inventory (O).
Go back to the Second Boulevard.
 Go to the First Boulevard (P).
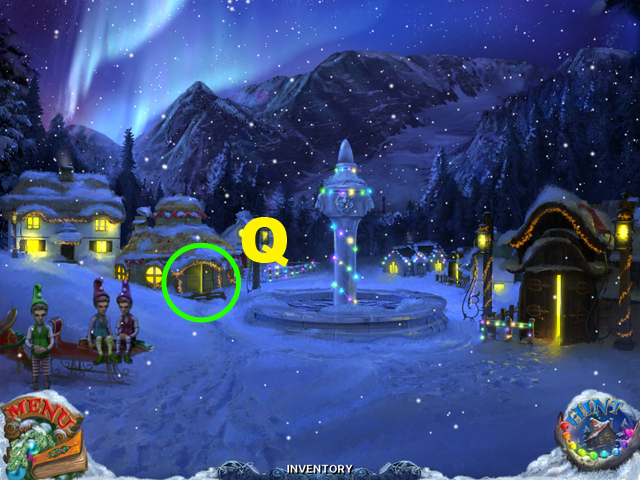
 Look at the chest (R).
Eat the chocolate lock (S).
Open the cover (T) and look inside (U).
 You will need to look inside the Box (V) and in the Purse (W).
Locate all the items in the list.
The POWDER will go into your inventory (X).
 Look at the Cask filled with jam (Y).
Use the LADLE on the FOURTH SYMBOL (Z).
Go back to the First Boulevard.
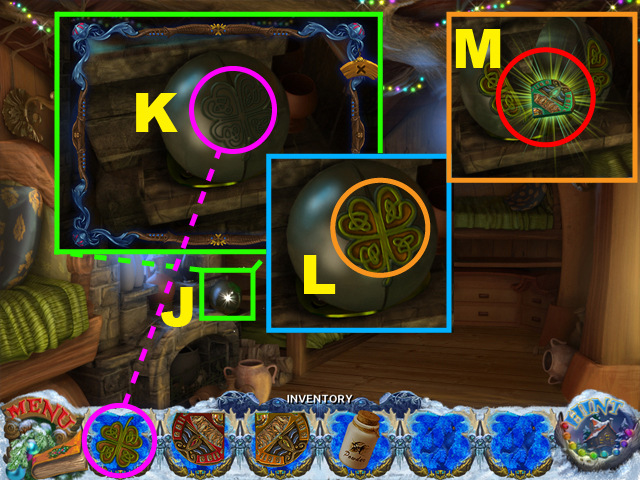
 Take the CLOVER EMBLEM (B).
Use the lever to release the ladder (C).
Examine the Second Floor (D).
Use the MAGIC GLOVE on the MAGIC CASKET to open it (E).
Look inside the MAGIC CASKET (E).
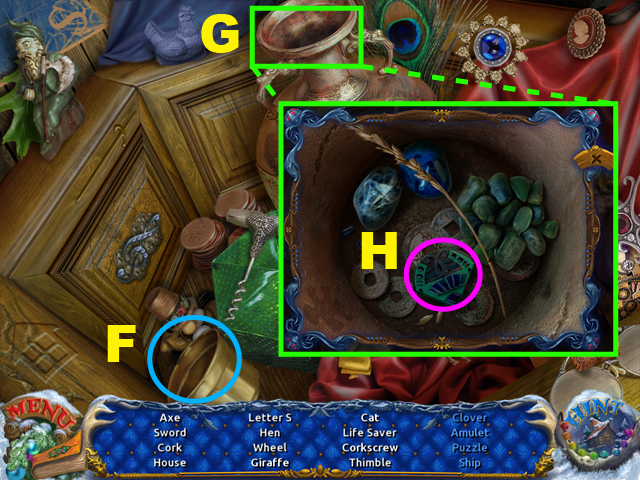 You will need to look inside the Pot (F) and in the Vase (G).
Locate all the items in the list.
The THIRD AMULET will go into your inventory (H).
Go back to the First Boulevard.
 Go back to the Second Boulevard.
 Examine the Magic Sphere (J).
Use the CLOVER EMBLEM on the Magic Sphere (K).
Open the Magic Sphere now (L).
Take the FIRST AMULET (M).
Go back to the Second Boulevard.

 Examine the table (O).
Use the POWDER on the Flask (P).
Take the SECOND AMULET (Q).
Go back to the Second Boulevard.
 Examine the door (R).
Use the FIRST AMULET (S), SECOND AMULET (S), THIRD AMULET (S) and FOURTH AMULET (S) on the door (T).
Open the door (U) and go inside the Santa's House (V).
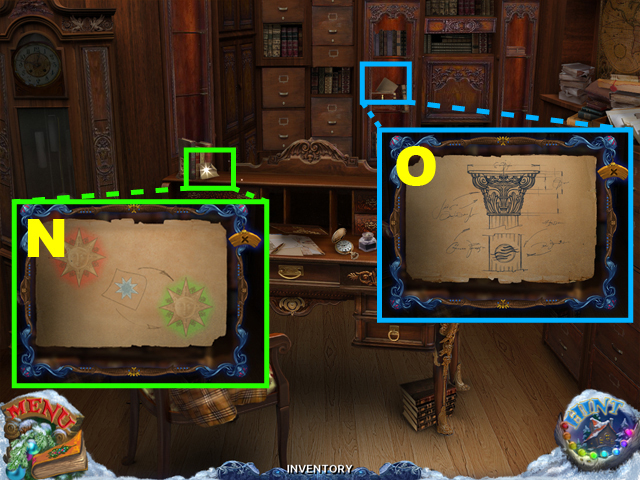
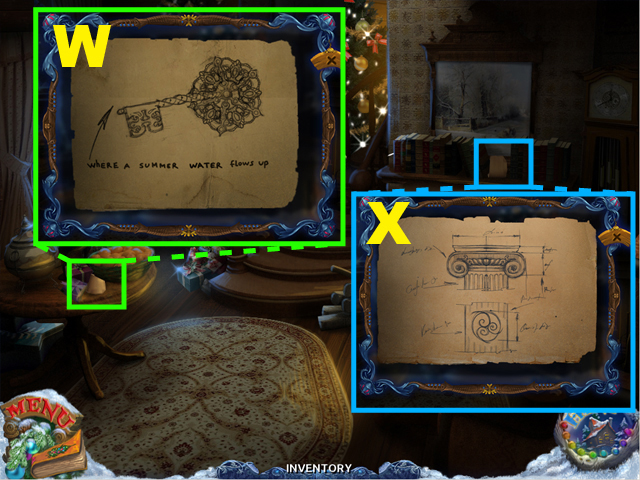 Look on the piece of paper (W).
Also look on another piece of paper (X).
Go back to the First Boulevard.
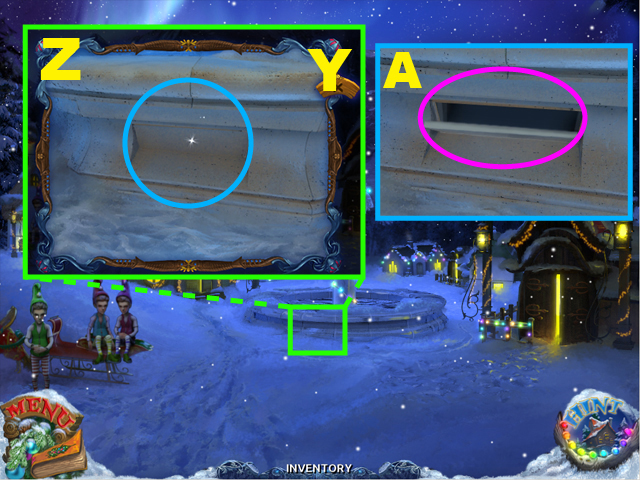 Examine the Hiding Place (Y).
Open the Hiding (Z).
Look inside it (A).
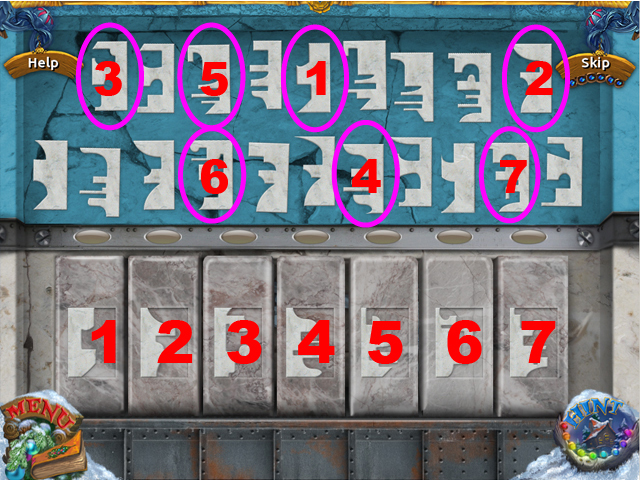 Pick up the missing element for the selected lock (1, 2, 3, 4, 5, 6, 7).
 Take the KEY (B) from Korvatunturi Mountain.
Go back to the First Boulevard.
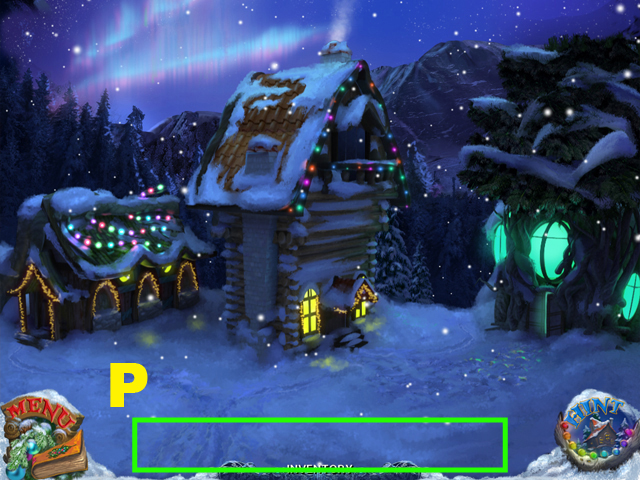
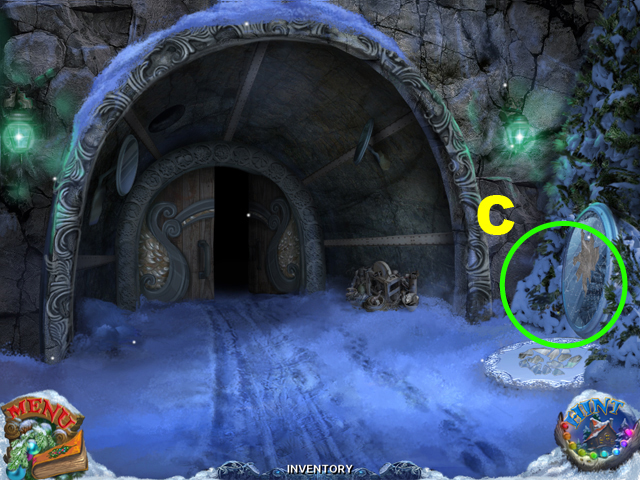
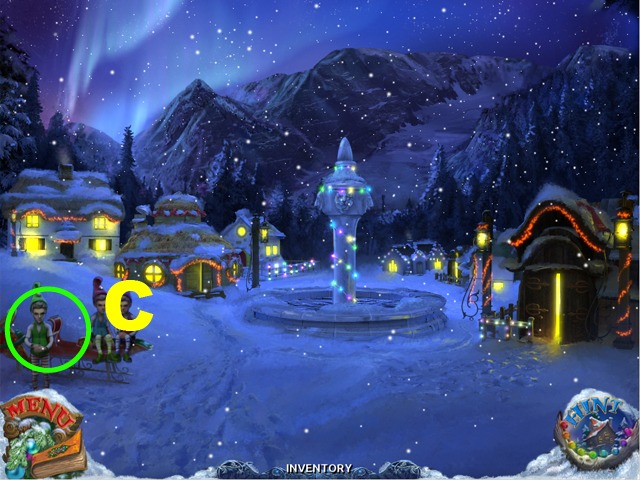 Talk with Elves (C) and fly to the Korvatunturi Mountain!
 Examine the Lock (A).
Use the KEY on the Keyhole (B).
 Examine the Broken Mirror (C).
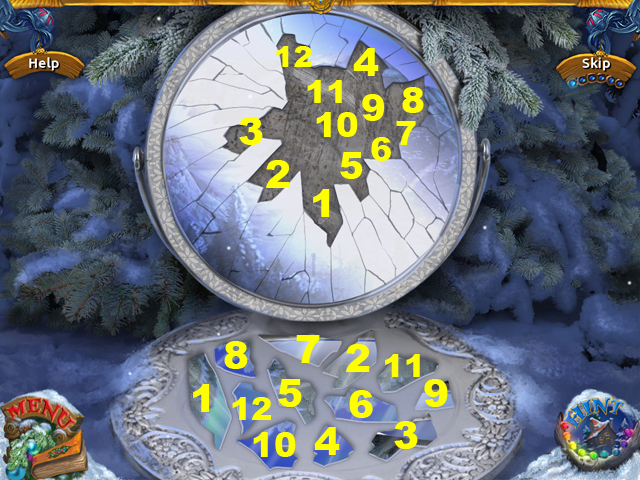 Place all the mirror pieces in the right place (1, 2, 3, 4, 5, 6, 7, 8, 9, 10, 11, 12).
Go back to the Mountain Door.
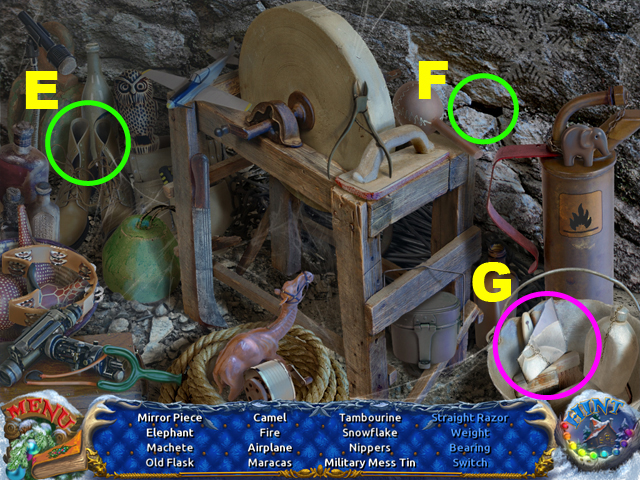 You will need to look inside the Shoe (E) and in the Hole (F).
Locate all the items in the list.
The MIRROR PIECE (G) will go into your inventory.
 Examine the Broken Mirror (H).
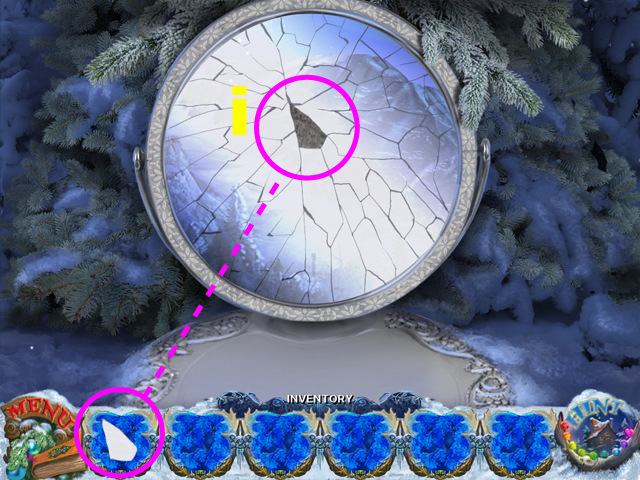 Set the Mirror Piece on the right place (I) .
Go back to the Mountain Door.
 Go inside the Korvatunturi Mountain (J).
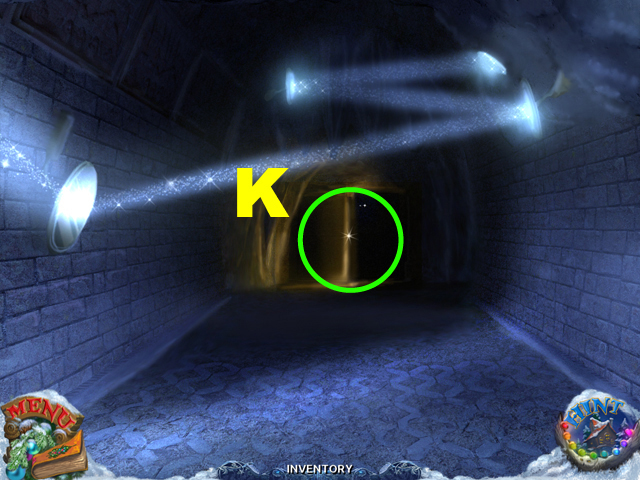 Go through the door to the Hall (K).
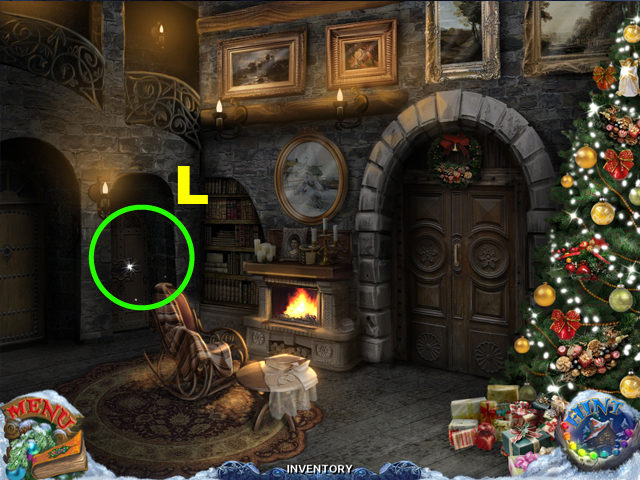 Open the door and go to the Treasury (L).
 Open the Hiding (M).
Close up it (N) and you will see that you need two figurines (O) to open it.
Go back to the Hall.
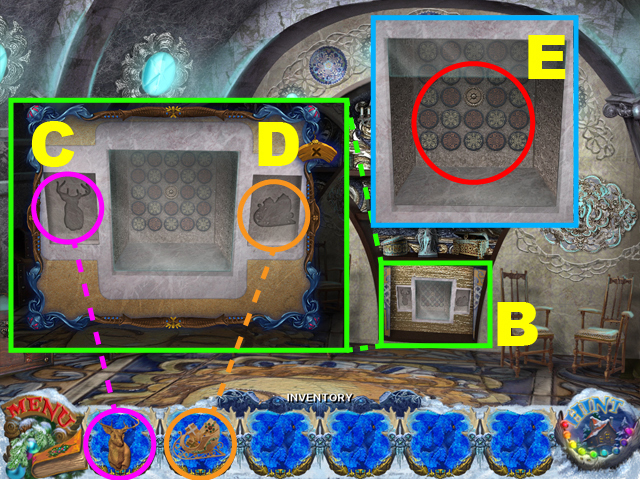
 Examine the Christmas Tree (P).
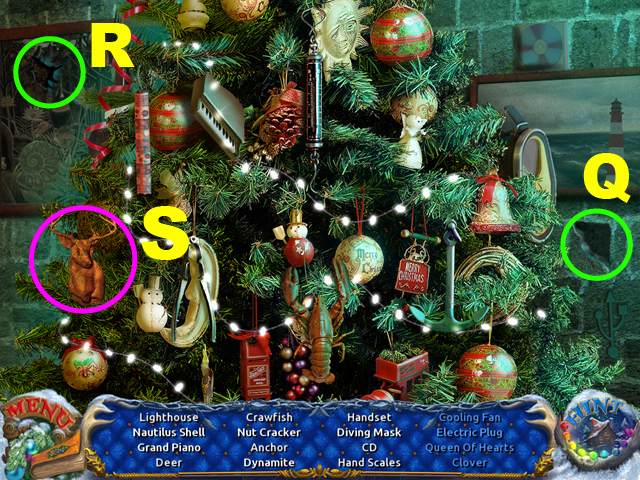 You will need to look inside the Hole (Q) and in the Picture (R).
Locate all the items in the list.
The DEER FIGURINE (S) will go into your inventory.
 Open the door and go to the Garage (T).
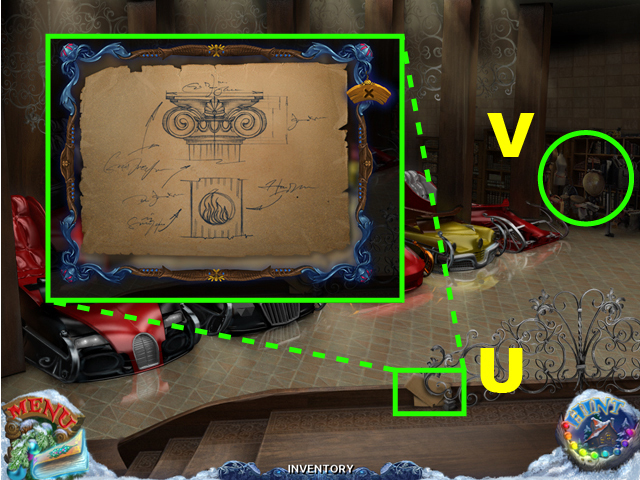 Look on the piece of paper (U).
Examine the trunk on shelves (V).
 You will need to look inside the Bag (W) and in the Casket (X).
Locate all the items in the list.
The SLEIGH FIGURINE (Y) will go into your inventory.
Go back to the Hall.
 Close up the Hiding (B).
Insert the DEER FIGURINE (C) and SLEIGH FIGURINE (D) on right places.
Examine the Hiding (E).
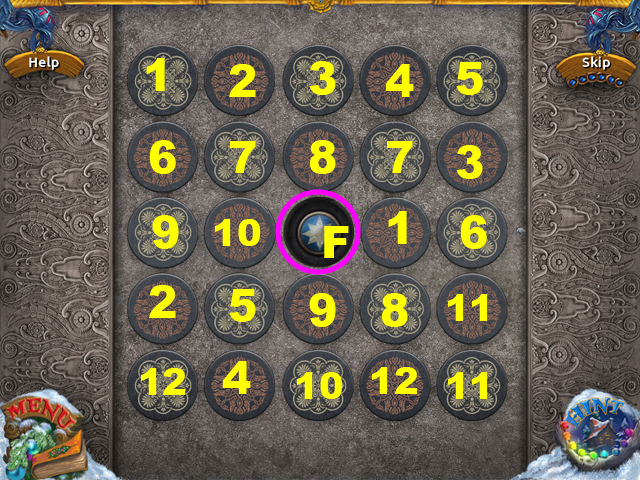 Pick up the same pictures by clicking on the cells (1, 2, 3, 4, 5, 6, 7, 8, 9, 10, 11, 12).
Push the Button (F).
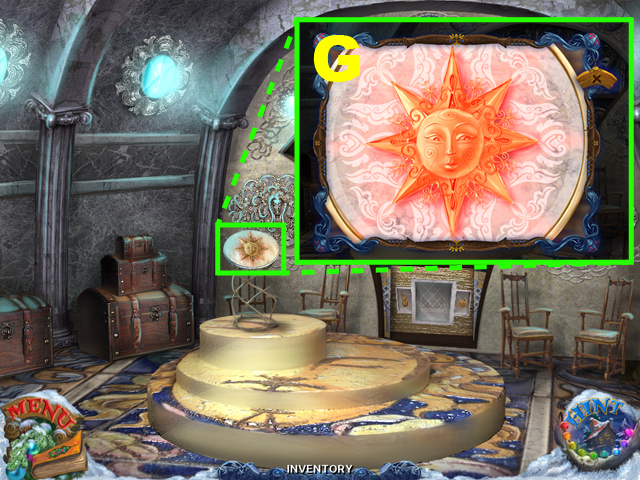 Examine the Santa's Star (G).
Go back to the Hall.
 Open the door and go to the Archive (H).
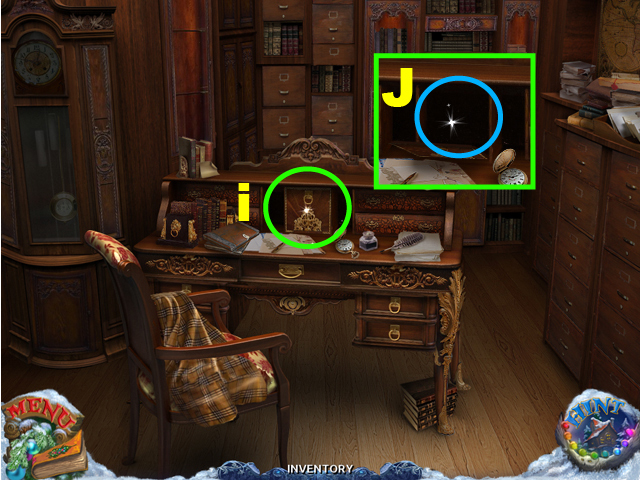 Open the cache (I) and look inside it (J).
 You will need to look inside the Casket (K) and in the Pitcher (L).
Locate all the items in the list.
The PENTAGRAM (M) will go into your inventory.
 Look on the piece of paper (N) to understand how to use PENTAGRAM.
Also look on another the piece of paper (O) to collect another hint about columns.
Go back to the Hall.
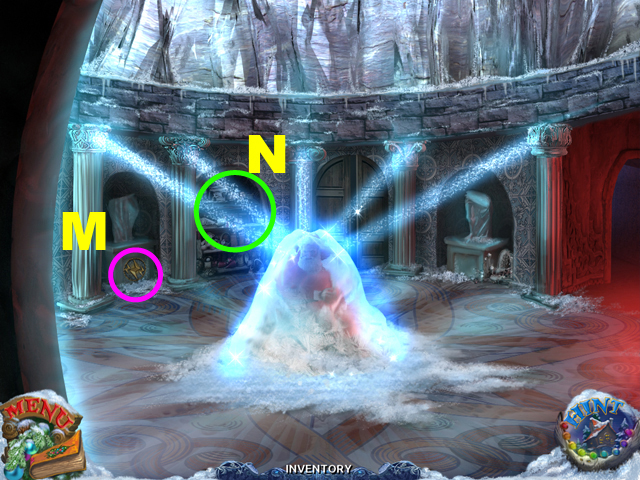
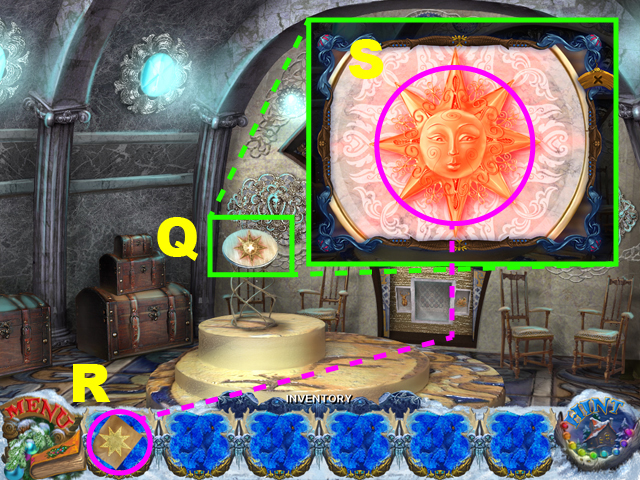 Examine the Santa's Star (Q).
Use the PENTAGRAM (R) on the Santa's Star (S).
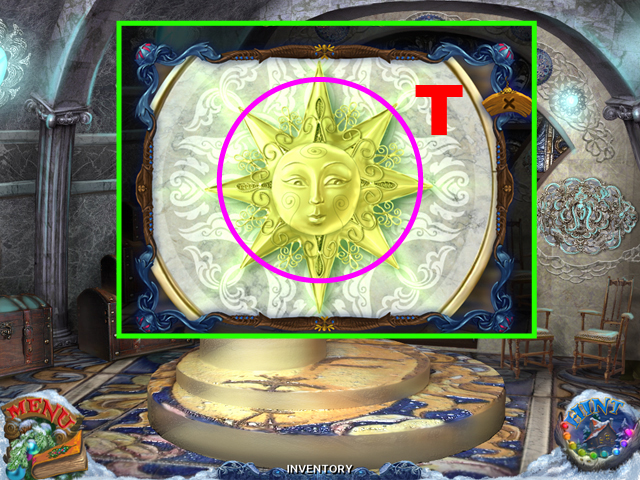 Take the Santa's Star! (T).
Go back to the Hall.
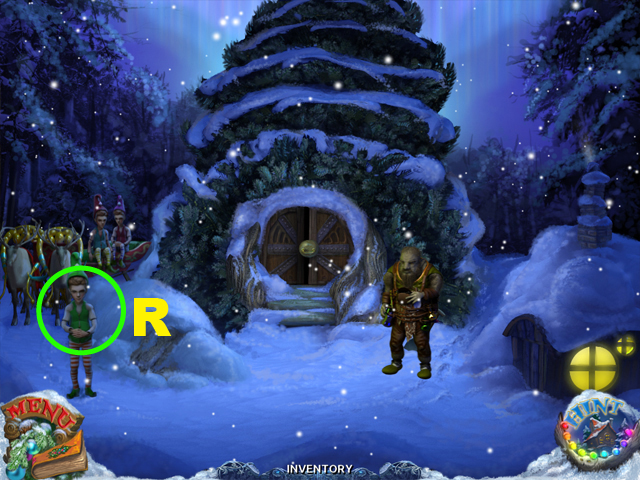
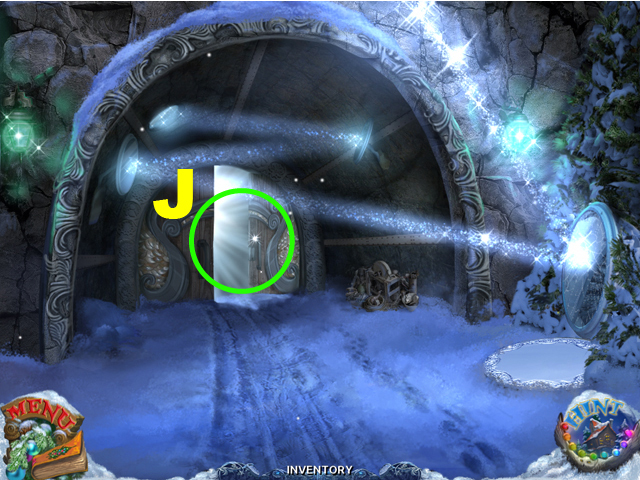
 Go back to the Mountain Door (U).
Fly with Elves to the Icy Elf's Castle.
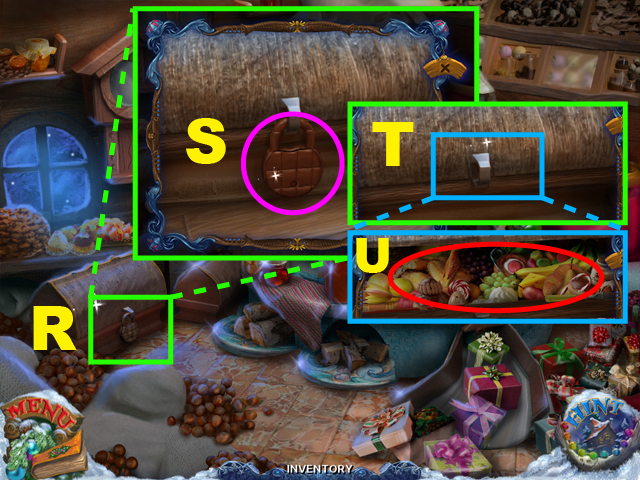
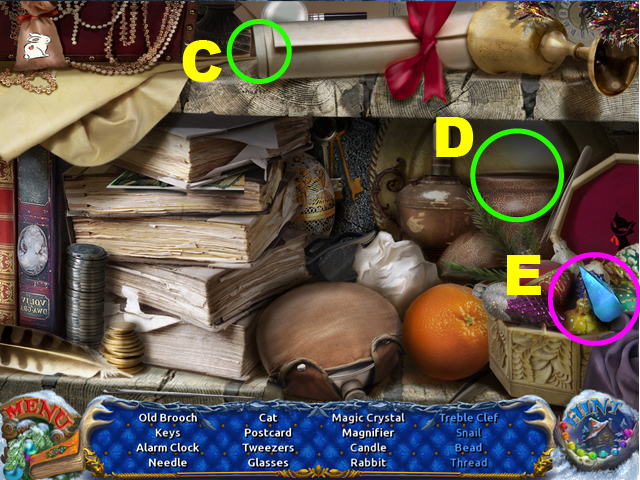 You will need to look inside the Roll (C) and in the Vase (D).
Locate all the items in the list.
The MAGIC CRYSTAL (E) will go into your inventory.
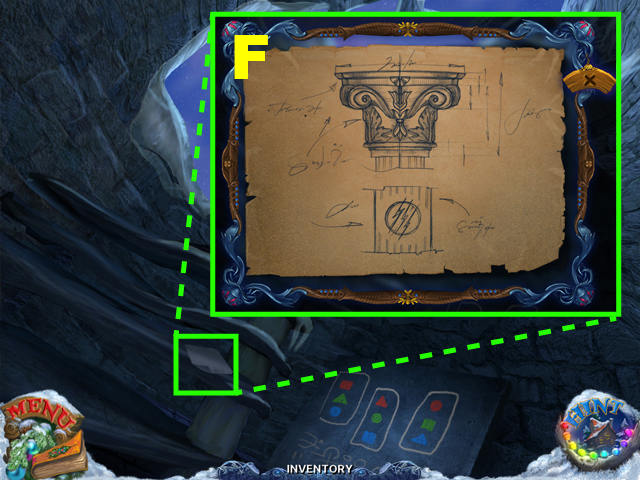 Look on the piece of paper (F) to collect another hint about columns.
Go back to the Castle's Roof.
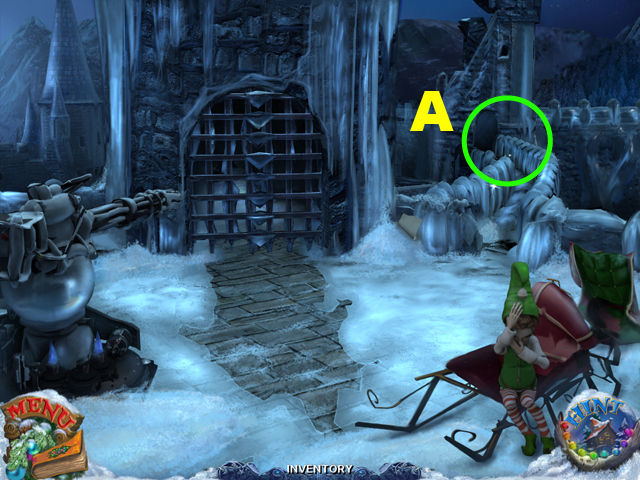
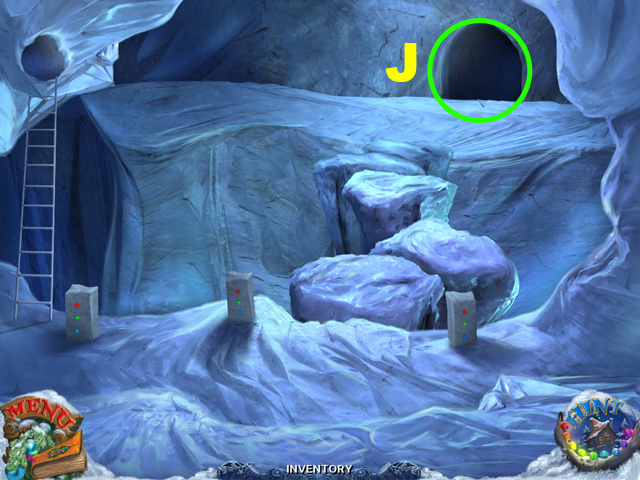
 Examine the Snow Cannon (G).
Use the MAGIC CRYSTAL (H) on the Hole (I).
 Turn on the Snow Cannon and destroy the Gate (J).
Go inside the Castle (K).
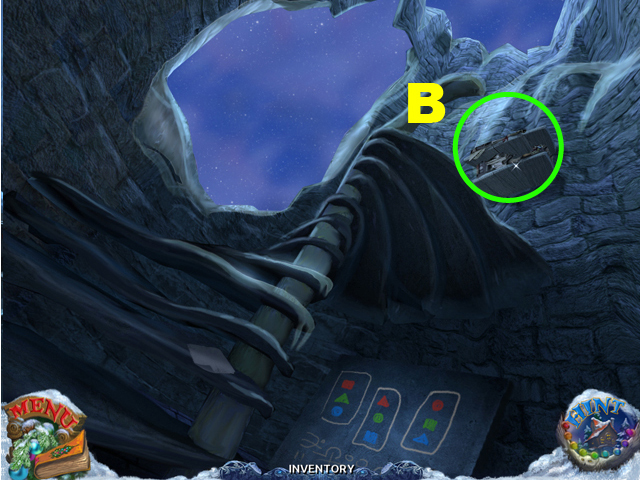
 Examine the Trunk in the right corner (L).
 You will need to look inside the Drawer (M) and in the Box (N).
Locate all the items in the list.
The CONSOLE BUTTON (O) will go into your inventory.
 Examine the Console (P).
Use the CONSOLE BUTTON (Q) on the Console (R).
Push the Button (S).
 Look at the Wall (T) and remember the Hint.
Examine the Floating Stones (U).
 Chose the stable stones to get to the other side in right order (1, 2, 3, 4, 5, 6, 7, 8, 9, 10, 11, 12,13,14,15,16,17,18,19,20).
Go to the other side (V).
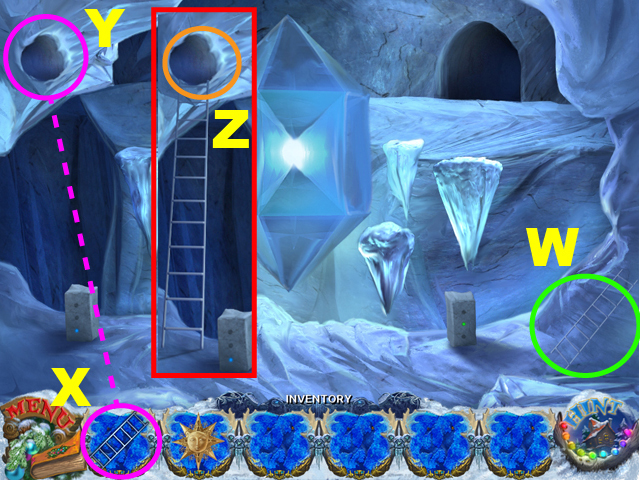 Take the LADDER (W).
Use the LADDER (X) on the Hole (Y).
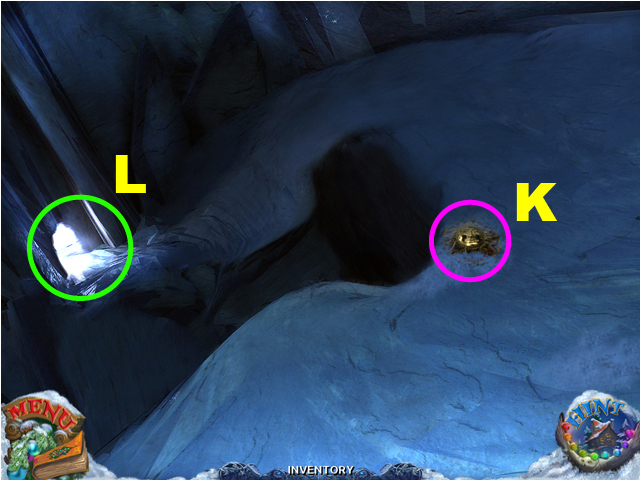
Examine the Small Cave (Z).
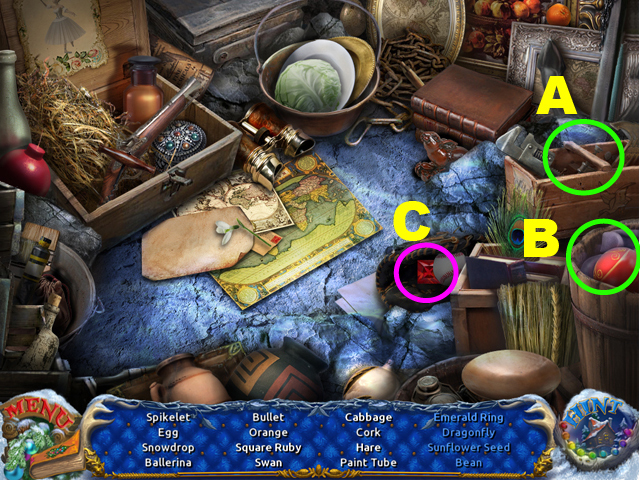 You will need to look inside the Box (A) and in the Wooden Bucket (B).
Locate all the items in the list.
The SQUARE RUBY (C) will go into your inventory.
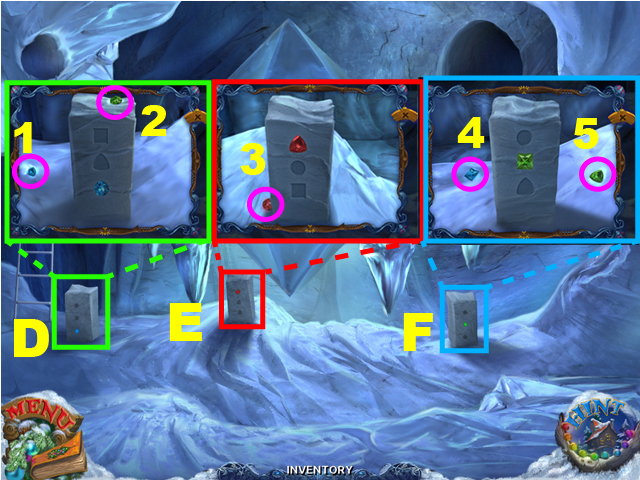 Examine the first Stone (D) and take the Gems (1, 2).
Examine the second Stone (E) and take the Gem (3).
Examine the third Stone (F) and take the Gems (4, 5).
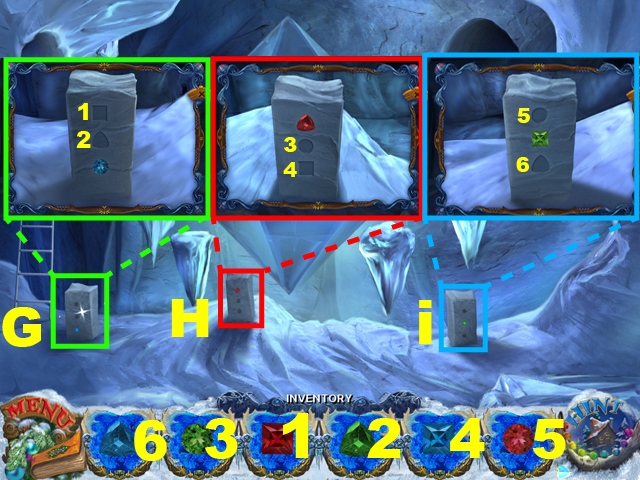 Examine the first Stone (G) and insert the Gems (1, 2).
Examine the second Stone (H) and insert the Gems (3, 4).
Examine the third Stone (I) and insert the Gems (5, 6).
 Take the FIRE AMULET (K).
Go to the Lighted Passage (L).
 Take the LIGHTNING AMULET (M).
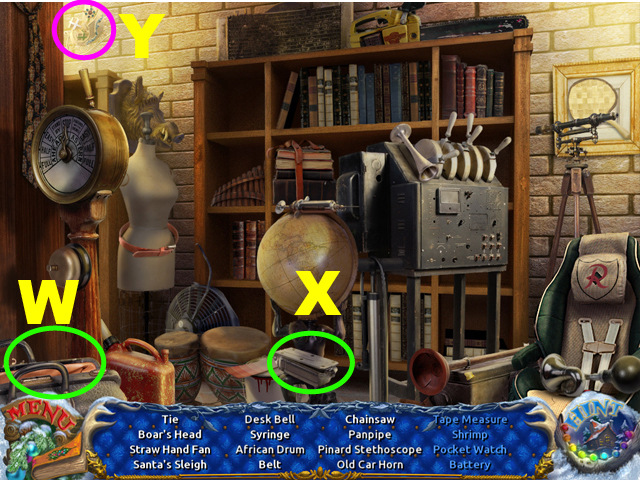
Examine the Shelves (N).
 You will need to look inside the Mug (O) and in the Watering Can (P).
Locate all the items in the list.
The AIR AMULET (Q) will go into your inventory.
 You will need to look inside the Casket (S) and in the Chest (T).
Locate all the items in the list.
The WATER AMULET (U) will go into your inventory.
 You will need to look inside the Old Kettle (W) and in the Vase (X).
Locate all the items in the list.
The EARTH AMULET (Y) will go into your inventory.
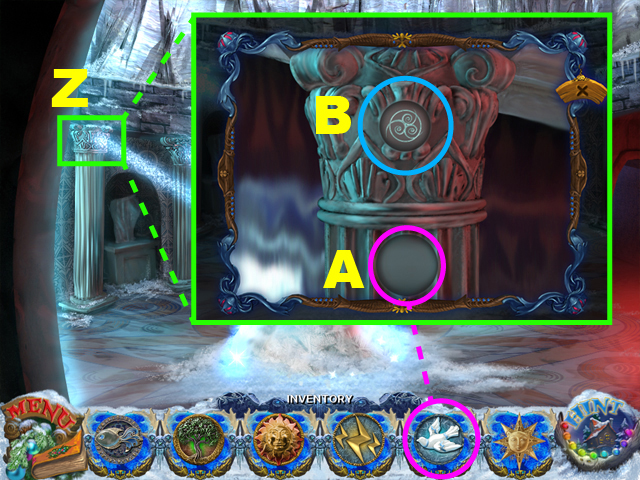 Examine the first Column (Z).
Insert the AIR AMULET into the slot (A).
Pick up the AIR SYMBOL (B).
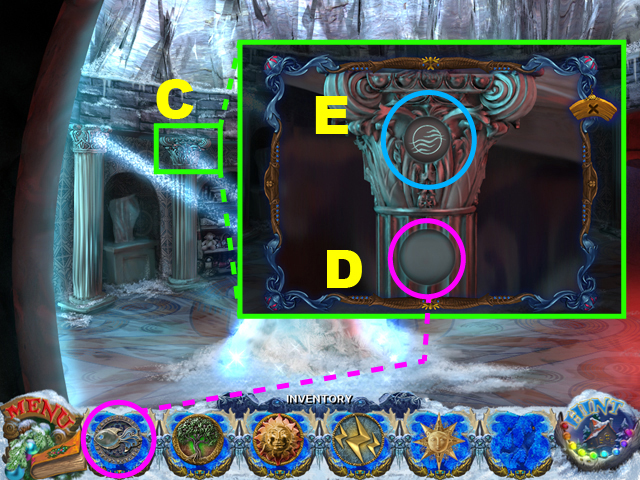 Examine the second Column (C).
Insert the WATER AMULET into the slot (D).
Pick up the WATER SYMBOL (E).
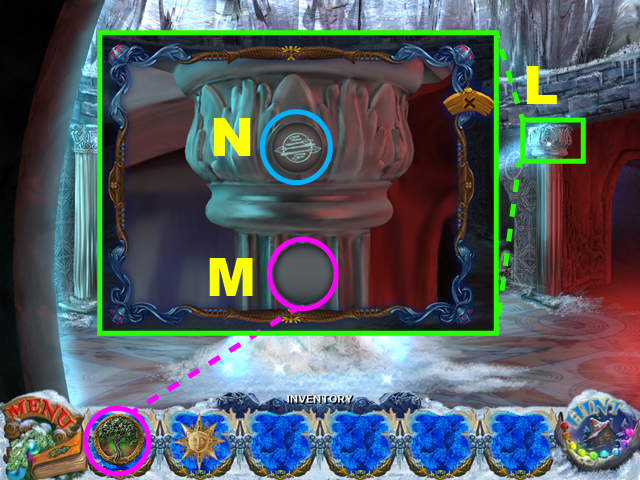
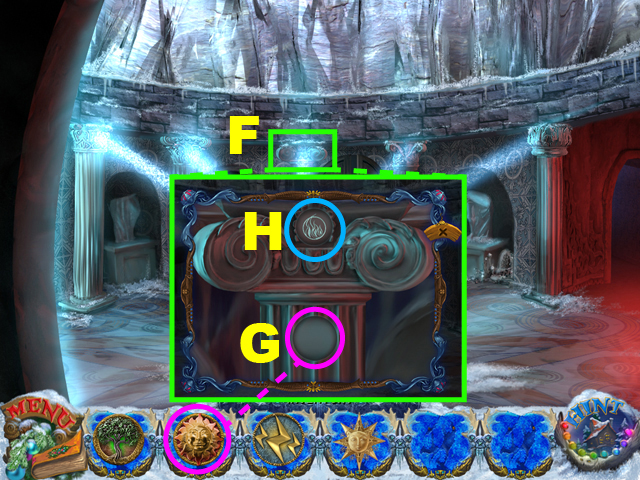 Examine the third Column (F).
Insert the FIRE AMULET into the slot (G).
Pick up the FIRE SYMBOL (H).
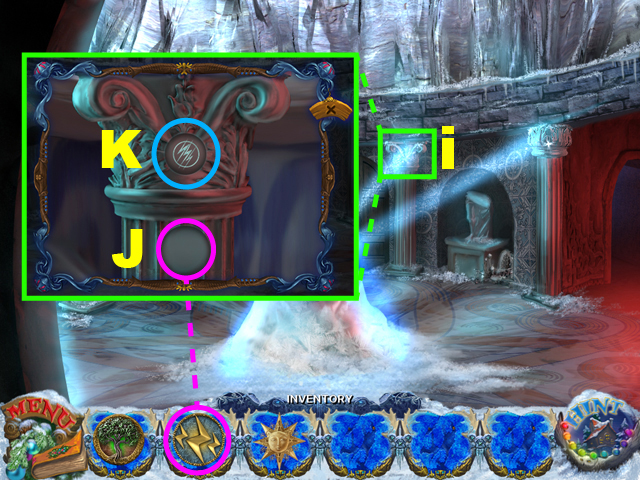 Examine the fourth Column (I).
Insert the LIGHTNING AMULET into the slot (J).
Pick up the LIGHTNING SYMBOL (K).
 Examine the fifth Column (L).
Insert the EARTH AMULET into the slot (M).
Pick up the AERTH SYMBOL (N).
 Use the Santa's Star on the Magic Collisions!!
Congratulations! You have completed Christmas Tales: Felina's Journey!!
No comments:
Post a Comment